As Christmas approaches, it is important for me to prepare for the holiday in a well-organized, thoughtful way. We can save a lot of time and energy if we compile and think through the tasks in time, from Christmas postcards to charity or the festive menu. This year I decided to write down the duties and plans in a DIY planner.
The new
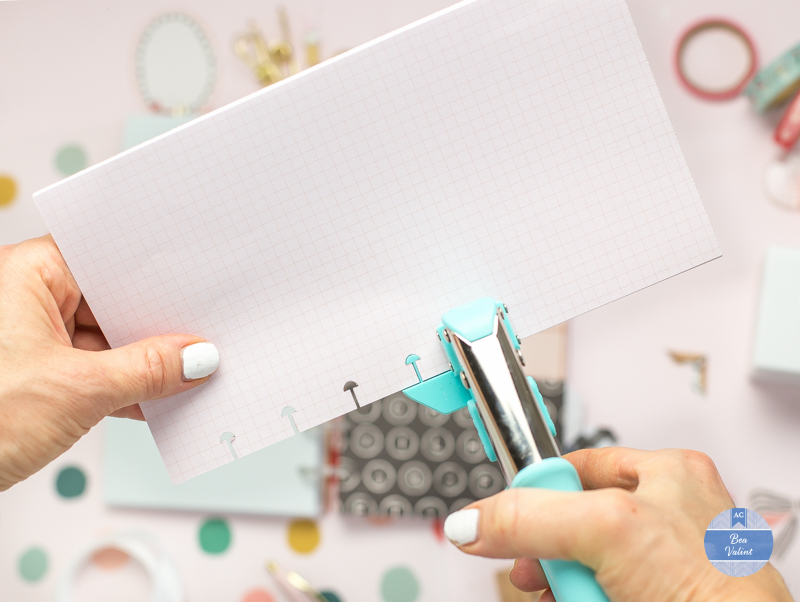
Disk Power Punch tool by WRMK inspired me to create a discbound base for my
planner. I’m not exaggerating when I say that this tool is sure to be my big
favorite. It easily punch through the hard cardstock cover or 10-12 sheets of
paper at once.
The size of
my planner is 12,5 x 22,5 cm. To create the cover, I used a heavy cardstock sheet.
I covered red acrylic paint on the edges of the cardstock, then I adhered patterned
paper pieces to both sides using double-sided tape. Fortunately, it was not a
problem for my Disk Power Punch tool to cut through all those layers. Next, I
trimmed down paper sheets to fill the planner with pages. It literally took
minutes to bind together the inside pages. I used glittered disks from the Day-to-Day collection to hold together the pages.
Next I
placed six pieces of dividers between the pages. I created the dividers using
patterned papers. I love the fact that I could add to my planner the accessories
from the Day-to-Day collection like the ruler or stencil.
To be more
organized, I added titles to my dividers, as Cards, Gifts, Decorate, Recipes,
Budget/Charity, Bucket List, etc. To create the titles, I used my Word Punch
Board tool.


Какой он красивый! Спасибо за вдохновение!
ReplyDeleteLOVE everything yo make!!!
ReplyDelete